Exercise Set 5: Writing Your Own Methods
-

Write an
onStripesFillButtonClickmethod, usingonRowMajorFillButtonClickas a guide. In every row, this algorithm should fill in every other column, so you want to increment the column by 2 rather than by 1. Remember that for the button magic to work, your new method method should not take any parameters, and should have avoidreturn type. Test your new method. -

Write an
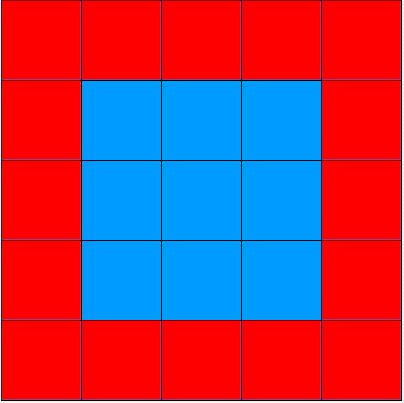
onReverseRowMajorFillButtonClickmethod, usingonRowMajorFillButtonClickas a guide. This algorithm should fill in cells bottom-up, going left-to-right across each row. In other words, the row order is reversed, but the column order is not. Test your new method. (The diagram represents a snapshot of this method in progress, filling in red blocks on a blue background.) -

Write an
onReverseColMajorFillButtonClickmethod, usingonColMajorFillButtonClickas a guide. This algorithm should fill in cells right-to-left, going up each column from the bottom. In other words, both the row and column orders should be the reverse ofonColMajorFillButtonClick. Test your new method. - Before you write an
onDiagonalButtonClickmethod, plan it out and list the locations that you want to fill.Hint: You do not need nested loops to implement this method!
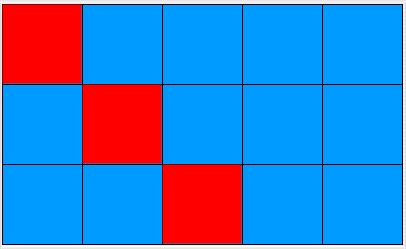
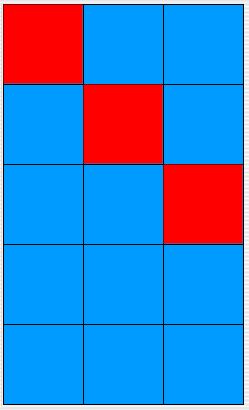
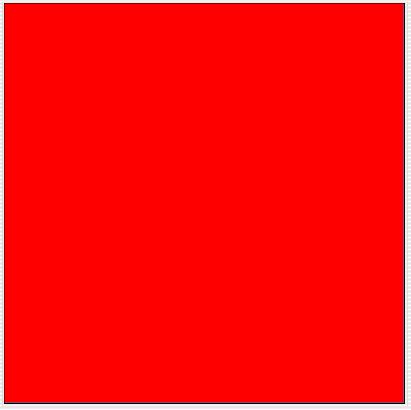
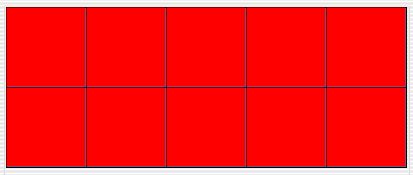
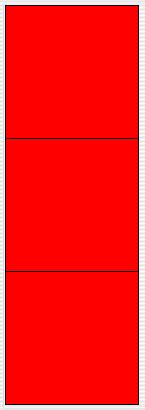
TheonDiagonalButtonClickmethod should not fill the entire grid; instead, it should color cells along the diagonal from the upper-left corner towards the lower-right corner. It will actually end up in the lower-right corner only if the grid is square. If it is not square, the algorithm steps down and to the right until it comes to the last column or the last row, depending on whether the grid is higher than it is wide or wider than it is high. The diagrams below show the behavior for a 5 x 5 grid, a 3 x 5 grid, a 5 x 3 grid, and a 1 x 1 grid.
When you're done with the implementation, test your new method in various sized grids, such as the ones above.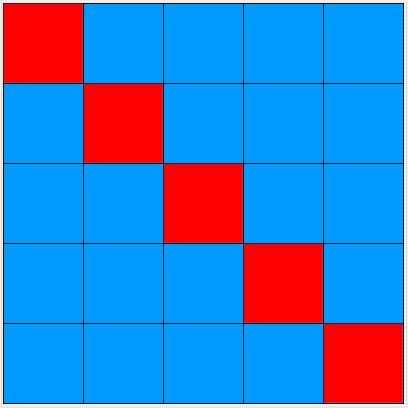
- Write a second diagonal method similar to the first one, but going
from the upper-right corner towards the lower-left corner. (Again,
whether it actually reaches the lower-left corner depends on whether
or not the grid is square.) Give your method an appropriate
name and test it in a variety of grids.
- Write a method that draws an 'X' in the grid, giving it an
appropriate name. Reuse existing methods as appropriate.
Hint: The best implementation of this method consists of two statements, with no loops.
When you're done, test your new method. The diagrams below show the behavior for a 5 x 5 grid, a 4 x 5 grid, a 5 x 4 grid, and a 1 x 1 grid.

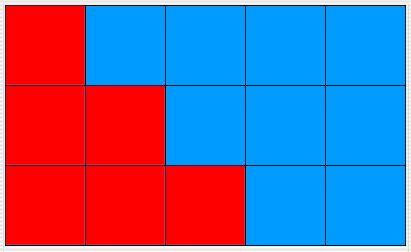
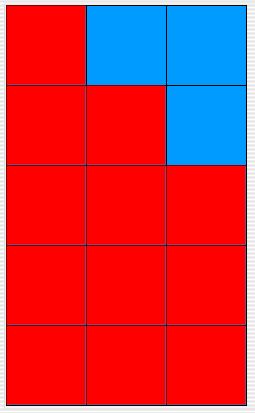
- Write an
onTriangleButtonClickmethod. This algorithm should fill in all the cells on and below the diagonal you produced in the preceding exercise. (It will form a true triangle only if there are at least as many columns in the grid as there are rows.) Before you attempt to write the code, list the locations that you want to fill. When you're done with the implementation, test your new class. The diagrams below show the behavior for a 5 x 5 grid, a 3 x 5 grid, a 5 x 3 grid, and a 1 x 1 grid.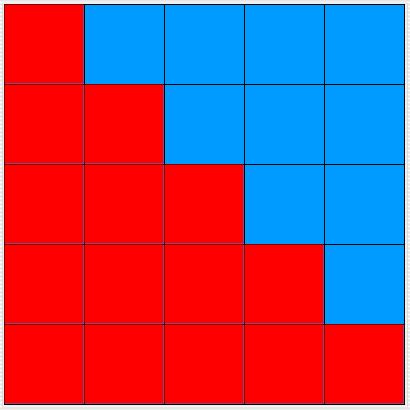
- Write a method that draws a border around the grid's perimeter.
Before you attempt to write the code, list the locations that you
want color in order to find a pattern. When you're done with the
implementation, test your new method. The diagrams below show the
behavior for a 5 x 5 grid, a 2 x 5 grid, a 3 x 1 grid, and a 1 x
1 grid.
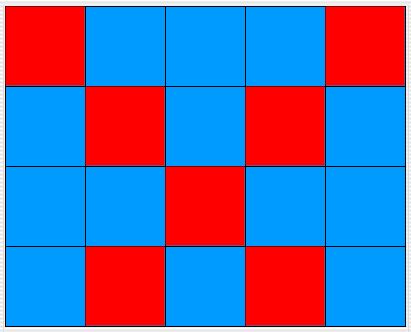
- Create a method that creates a checkerboard pattern on the grid
(left image). OR Write a method that creates a
"checked shirt" pattern (right image). You might find the
remainer operator (
%) useful when writing this method. When you're done with the implementation, test your new method.
OR 
- Write an
onFindWaldoButtonClickmethod. This method should do a row-major traversal through the grid until it encounters a Waldo object (or any other object), or until it has completely filled the grid. In other words, it is similar to theonRowMajorFillButtonClickmethod, except that it stops (returns) as soon as it comes to a non-empty cell. To test it, use thePlaceWaldobutton to place Waldo in the grid and then test yourFindWaldobutton. - Write three (or more) new methods that you could use to draw a
picture. For example, you could create a method that draws the
walls of a house, a method that draws a roof, and a method that
draws four windows. A user could then use your methods to draw
black walls, a red roof, and blue windows. Your picture should
draw in grids of different sizes, scaling up or down as
necessary. You may, however, specify a minimum size if you want;
for example, this picture will only draw correctly in a grid that
has at least 20 rows and at least 20 columns. You may also want
to specify that the grid has to be square, or that the number of
columns must be twice as many as the number of rows. Whatever
your constraints are, be sure to document them in the
javadocdocumentation for the appropriate methods in theGridPlotterclass! - Provide appropriate documentation under the "Help"
menu. To do this, you will need to edit the
GridPlotterAppclass. Look for the statement that constructs the "Help" menu. Provide the appropriate information for the author(s), assistance, and date. Then create a document calledGridPlotterHelp.htmlthat contains information for users about what the program is, how it works, what it does, etc. Be certain to provide a brief description of your new methods and how they can be used to draw a picture. Document any assumptions that your methods make about the size and shape of the grid, as you did in theGridPlotterclass. Save this file in the folder where you run the program. Run it and test both menu items in the "Help" menu.An HTML file has two main sections: a head and a body. A bare-bones HTML file would look like this:
When viewed in a browser or other program that knows how to interpret HTML formatting commands, it would look like this:<!doctype html> <html> <head> <meta charset="UTF-8"> <title>GridPlotter Help File (Window or Tab Title)</title> </head> <body> <h1>GridPlotter Help File (Big Heading)</h1> <p> Your text would go here. Each paragraph is surrounded by paragraph "tags" ("<p>" and "</p>"), just like this one. </p> <p> If you want to force line breaks<br> in the middle of a paragraph, use the "<br>" tag. </p> </body> </html>GridPlotter Help File (Big Heading)
Your text would go here. Each paragraph is surrounded by paragraph "tags" ("<p>" and "</p>"), just like this one.
If you want to force line breaks
in the middle of a paragraph, use the "<br>" tag.